Google Ads Attribution
Part 3: Storing UTM information and more in the CRM System
Storing UTM information and more in the CRM System
Our Website visitor has filled out a form and clicked Submit. In Part 2 all the data we captured was bundled-up including the campaign UTM values to be sent along with the form data. Now we need to make sure this data is stored in the CRM System.
There are two steps here: we need to create the fields to store the data, and we need to populate these fields when a form is submitted. The actual implementation of these steps depends on the CRM System you use. For this example we're going to use Salesforce as the CRM system.
A: Creating Salesforce fields to store the data
The typical Salesforce Sales Cloud configuration has a Lead object where all new leads are stored and qualified, and an Opportunity object for qualified leads.
To store the visitor and campaign data from the website we need to create new fields in the Lead object for this data. Let's say we have decided to store the UTM values from Google Ads like utm_source.
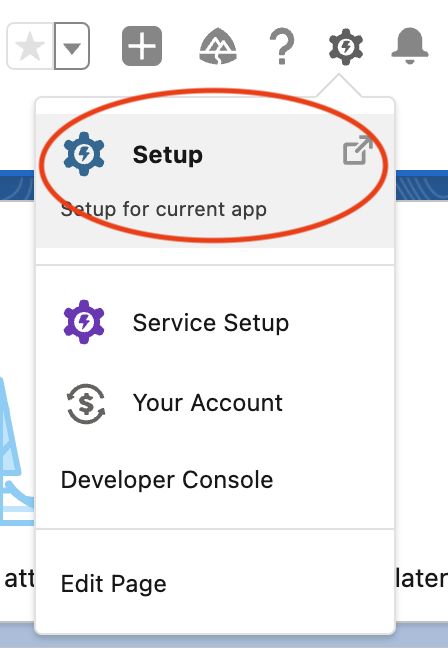
The UTM values are all text fields and so we want to add new text fields to the Lead object. To do this in Salesforce click on Setup in the top right menu:
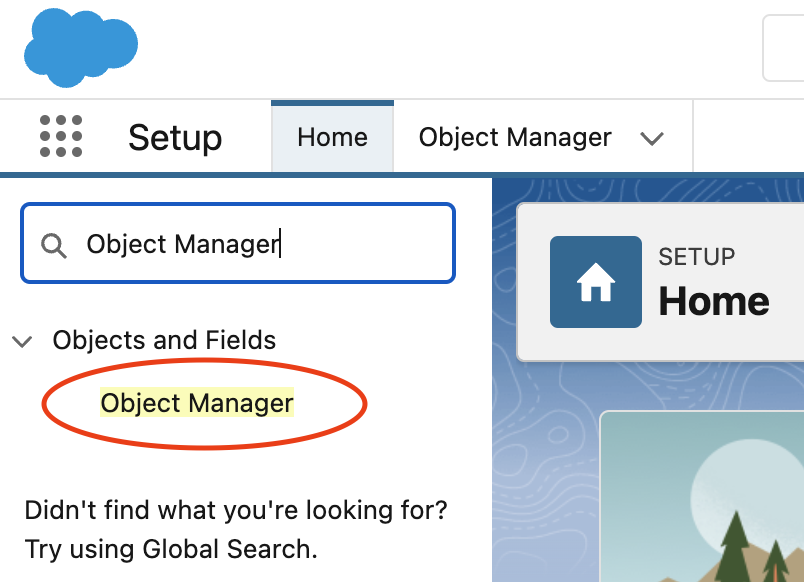
Then enter 'Object Manager' in the Search box and click on the 'Object Manager' link under 'Objects and Fields':
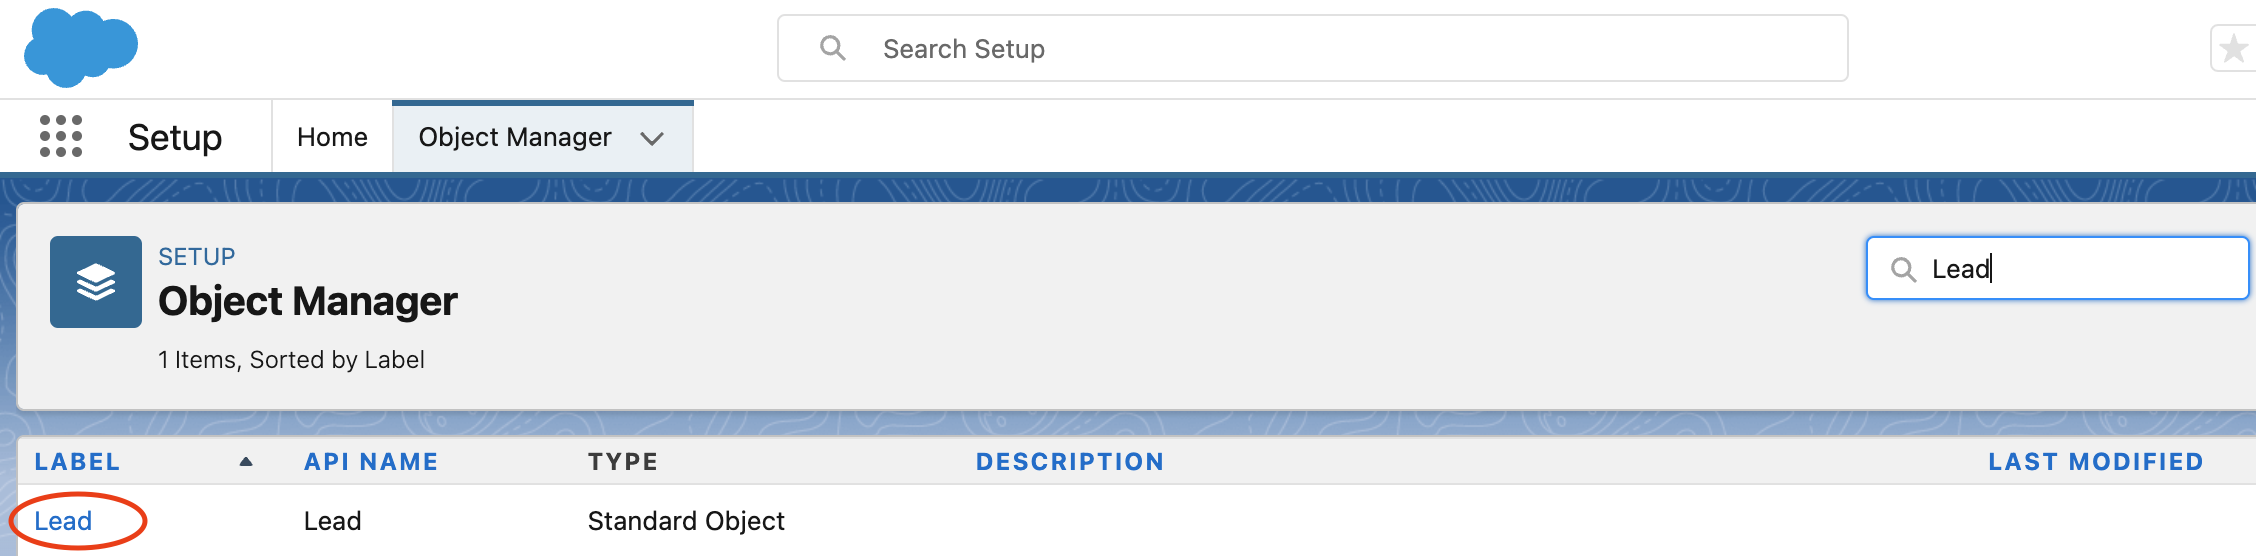
Typically, you will be using the 'Lead' object for new prospects from your website. Search for 'Lead' in the Object Manager:
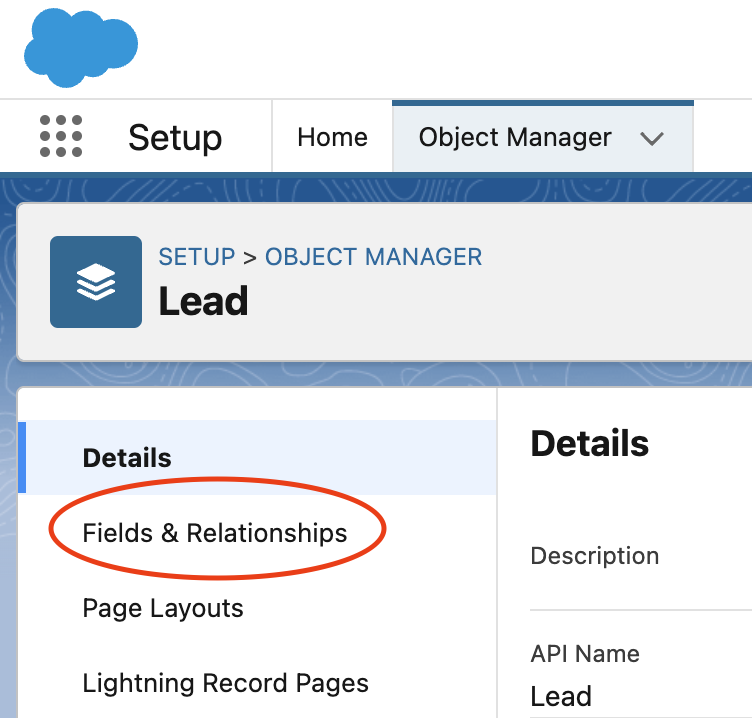
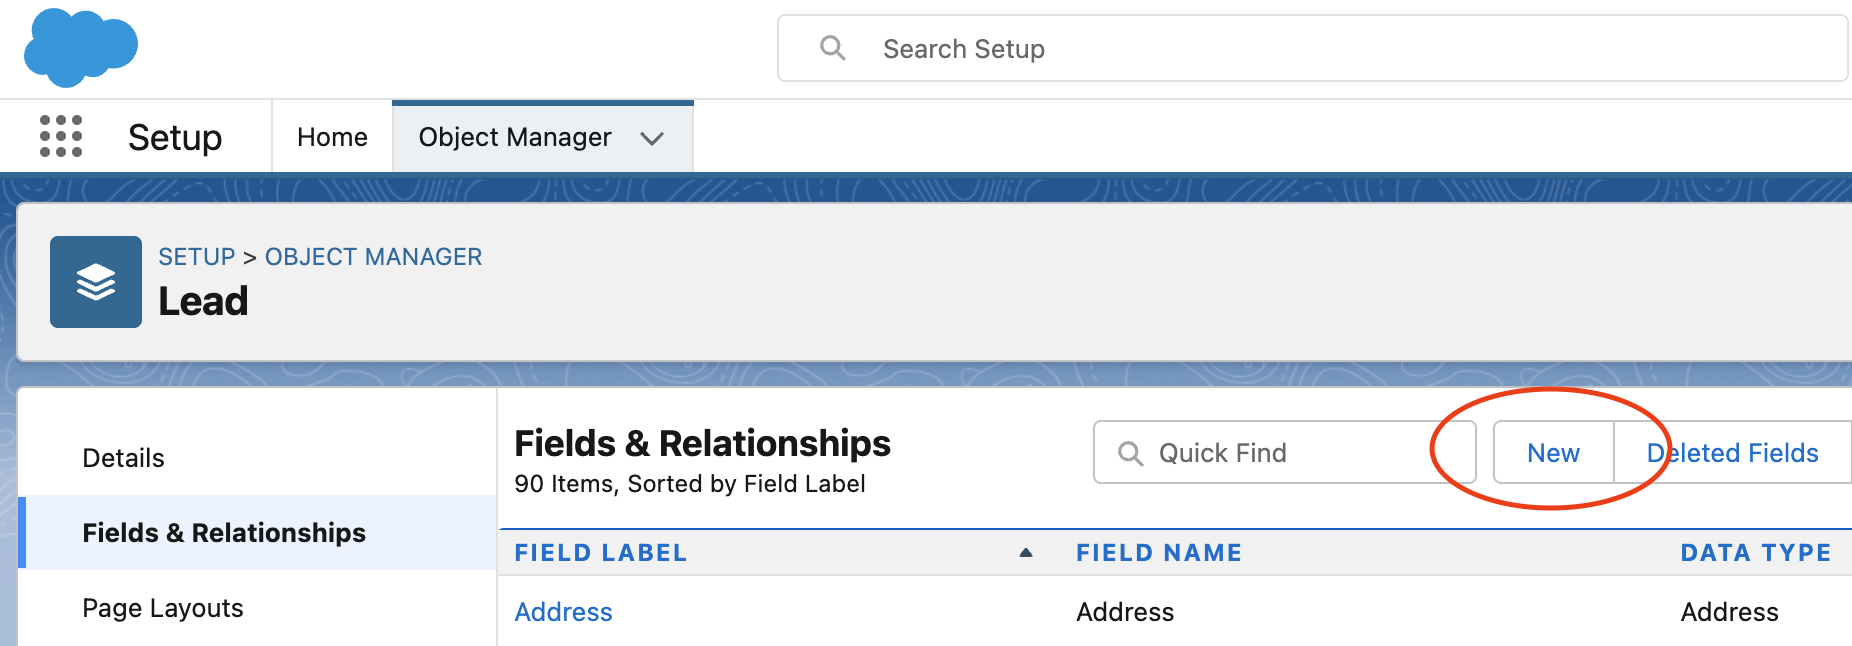
We're interested in adding custom fields to store our data so click on 'Fields & Relationships':
Here you'll see all the fields in the Lead object. Click 'New' to add a new field:
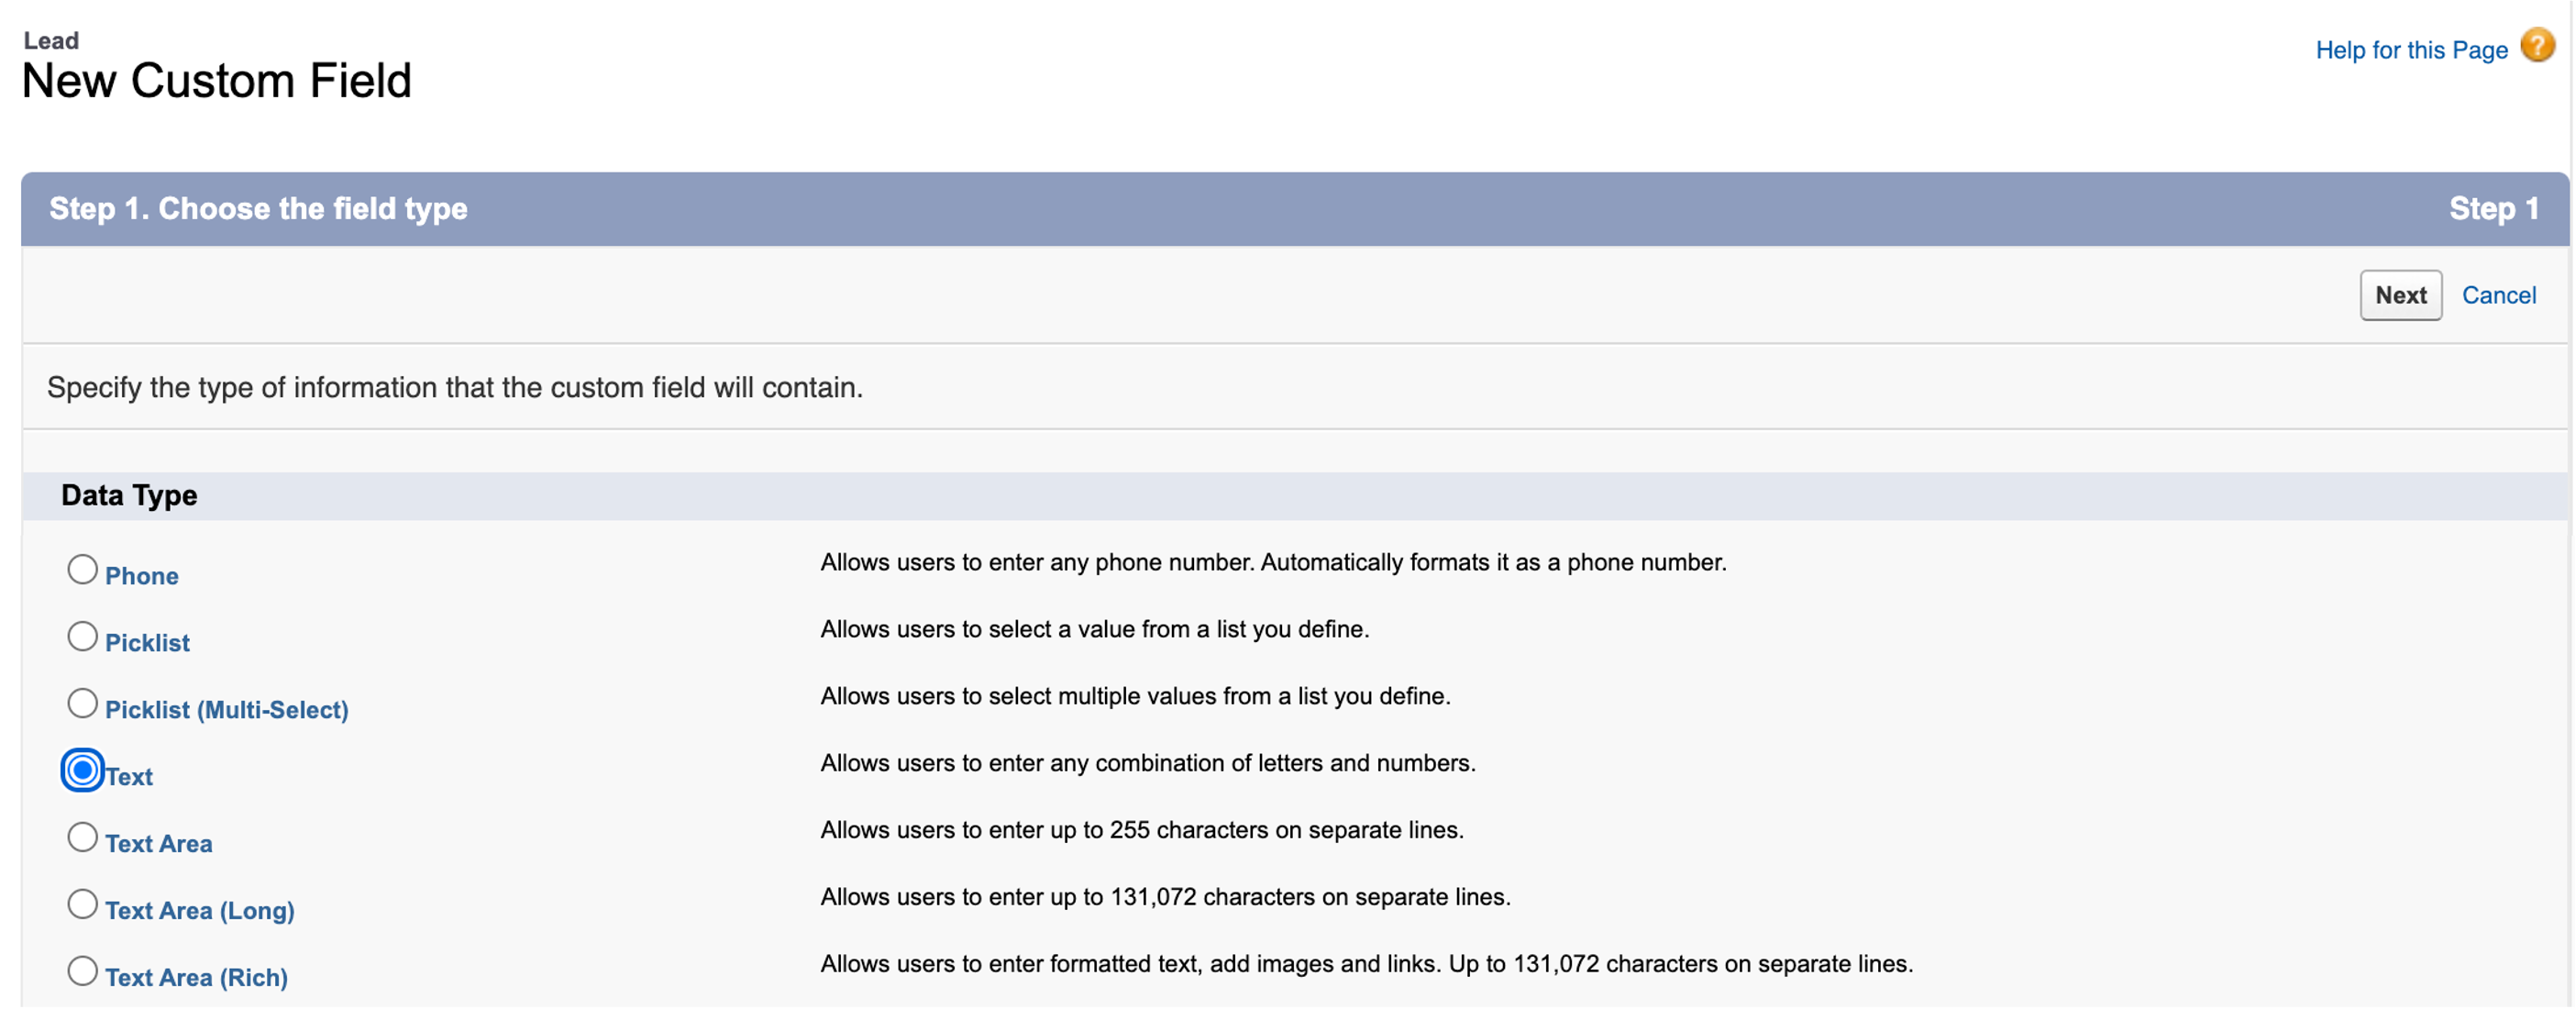
The field type we want for most of our fields is a Text field so select this and click 'Next':
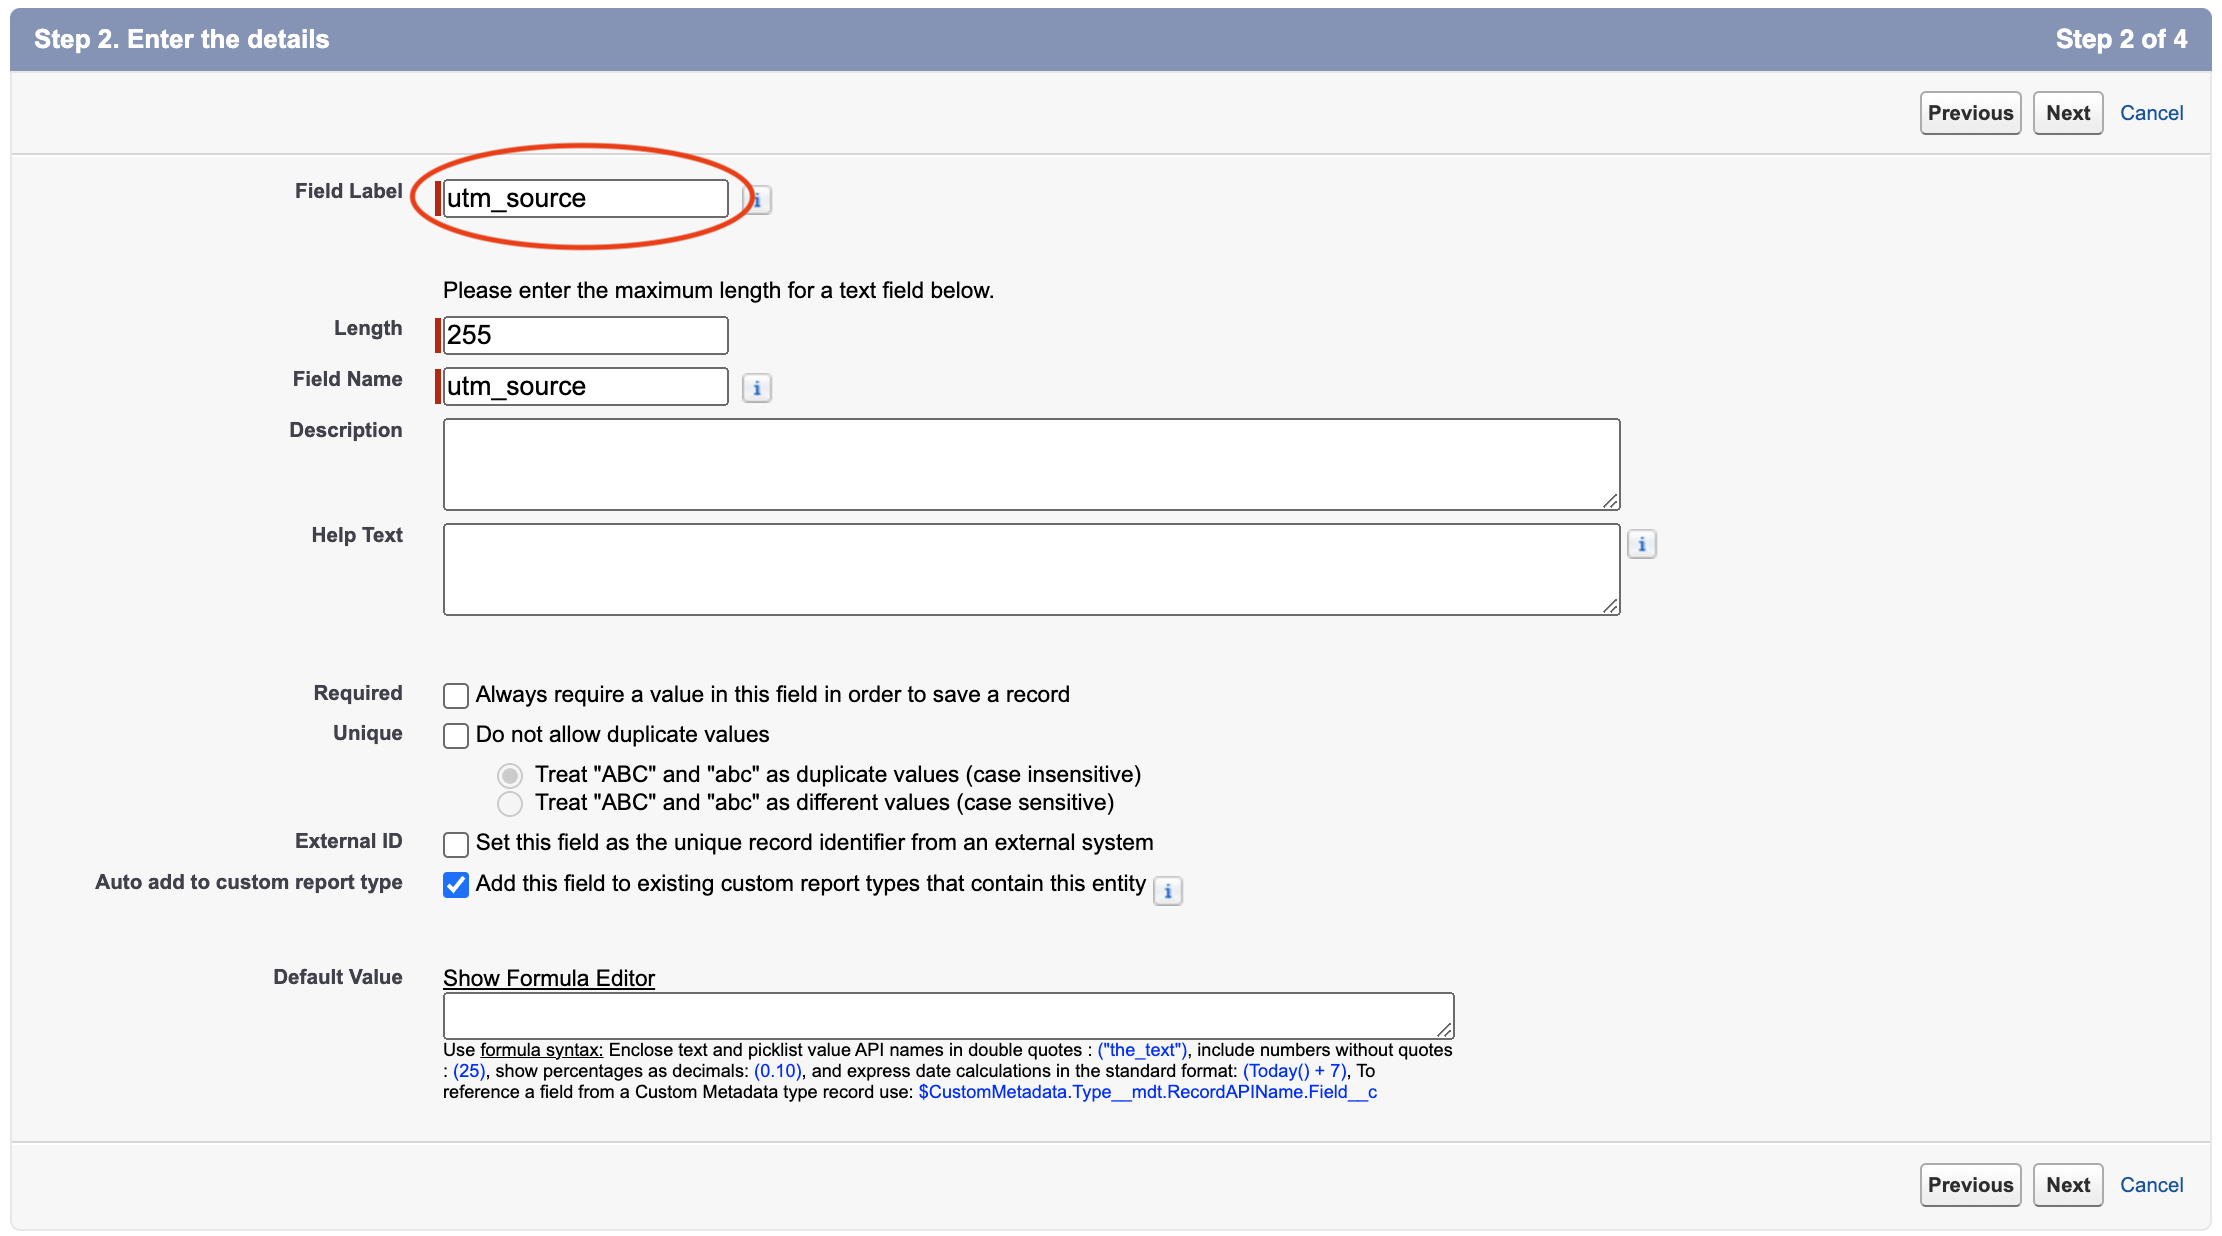
Enter the Field Label as one of the fields we want to capture, such as 'utm_source'. The Field Name will automatically populate for you. For the Length, the maximum field length for a Salesforce Text field is 255 characters and we suggest you set this length. You don't need to make other changes - just click 'Next':
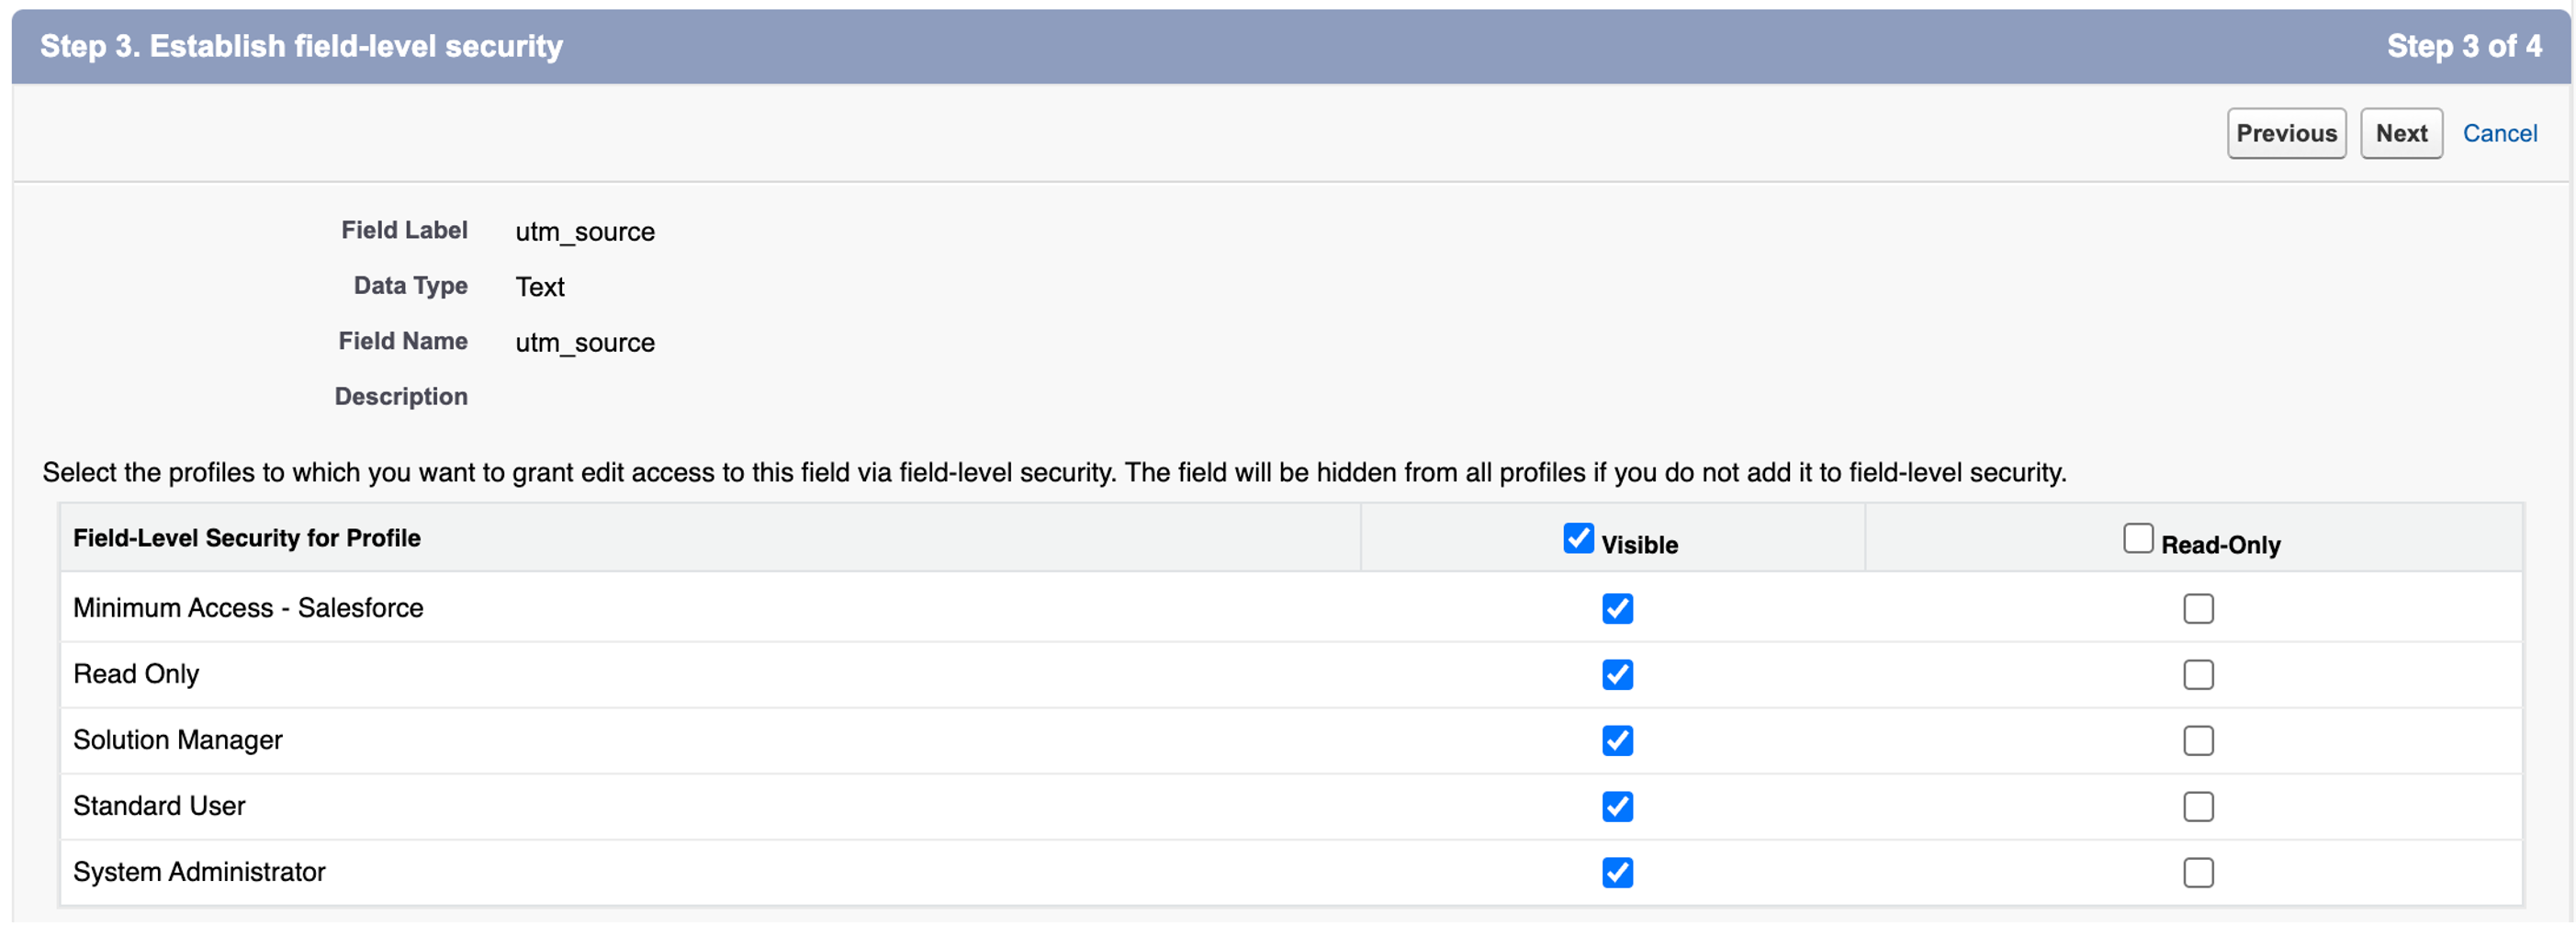
The third step is to set the Security for this field: who can see the field and whether they have 'read-only' access. Your Salesforce administrator can guide you on the right settings here. The marketing data is typically not viewed as needing high levels of security protection so we often use 'Visible' for all user profiles:
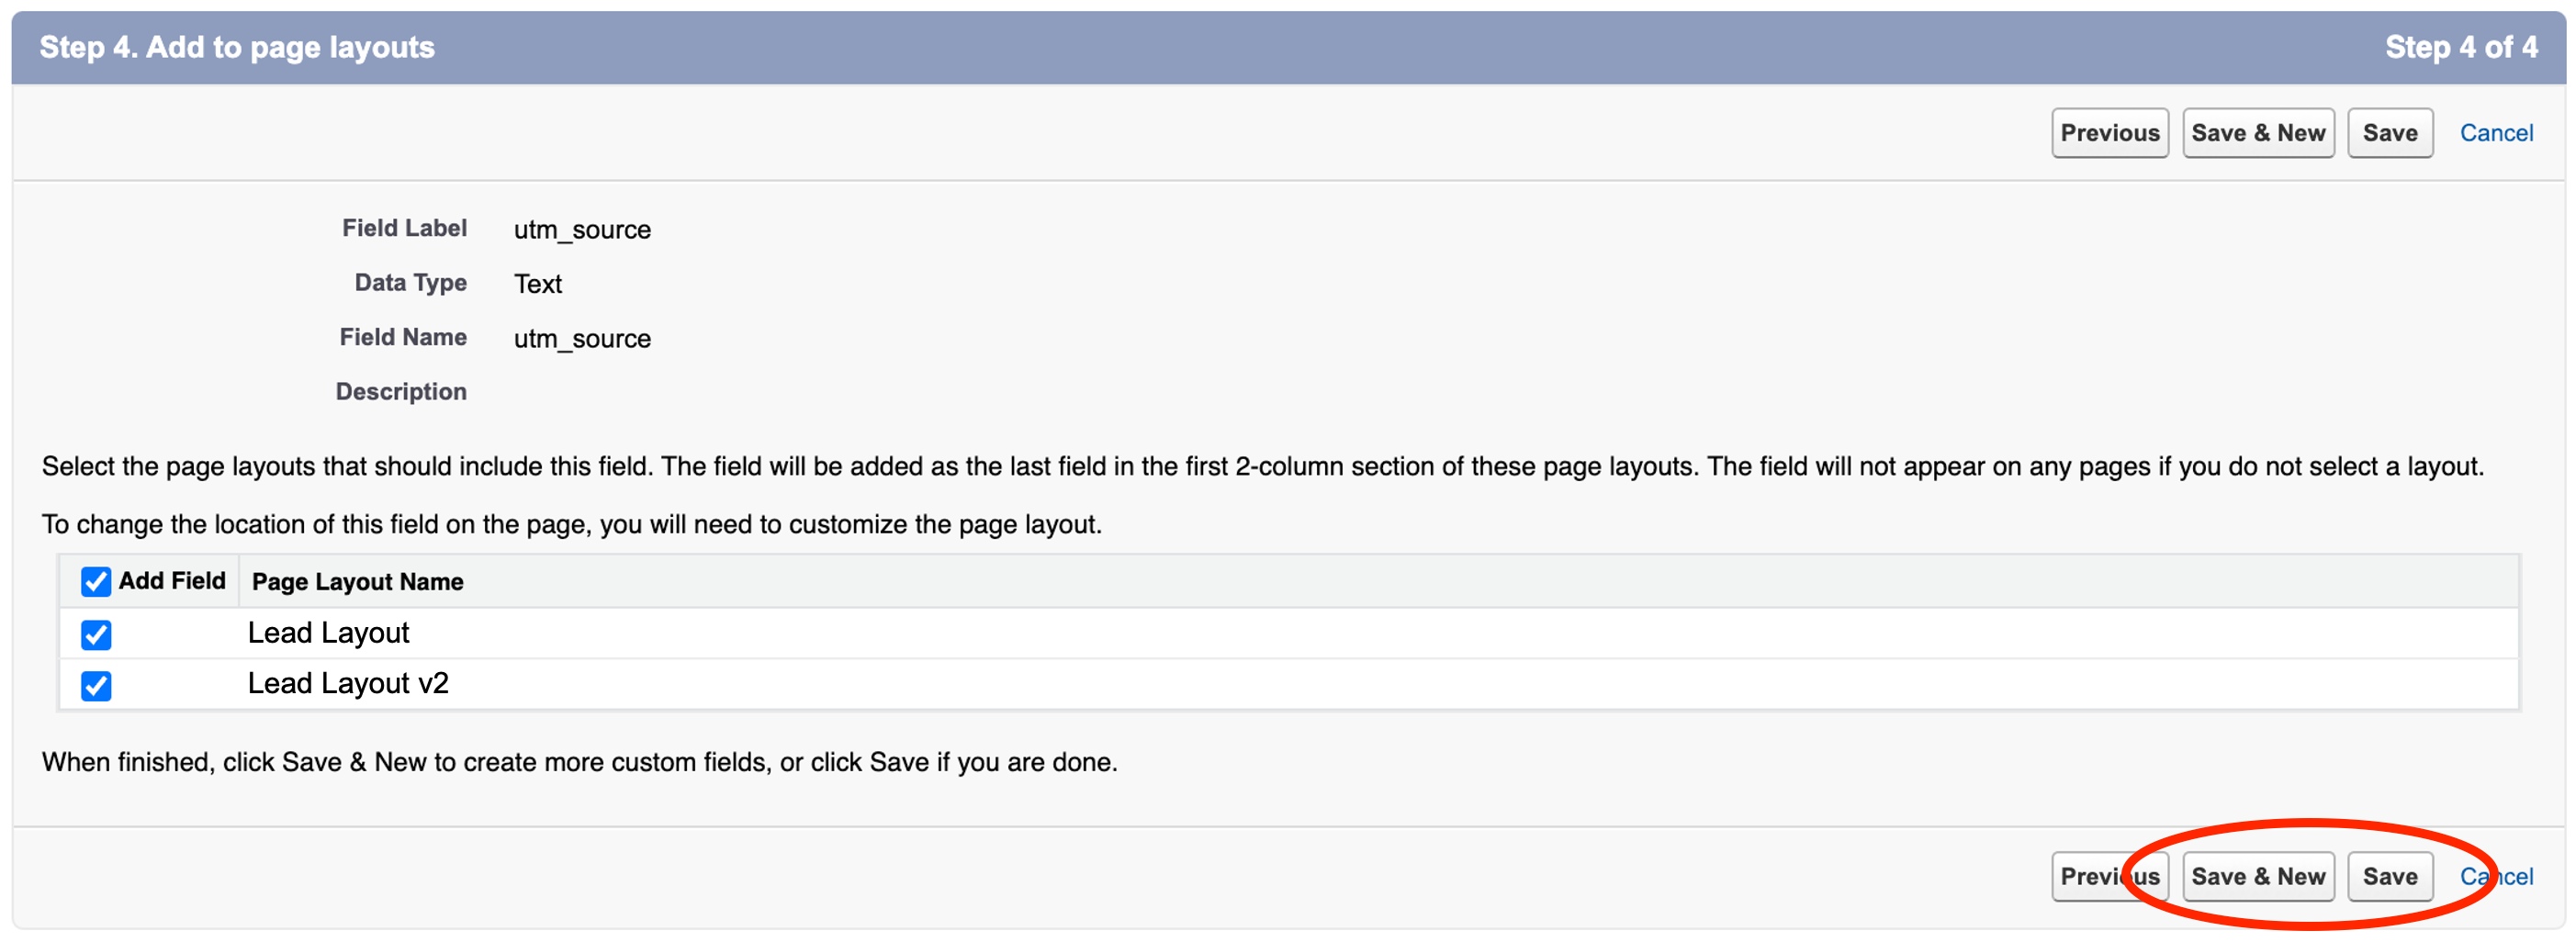
The final step is to confirm which page layouts will include this field. Typically you want to include the marketing fields on the standard pages so we suggest you leave the fields checked. Now click 'Save' to complete this field setup. You can also click 'Save and New' which will save this field and take you to the start of the step to add the next new field:
You repeat the above steps for each of the marketing fields you want to include in the Lead object.
Most of the fields we provide work well with the Salesforce Text field type. Exceptions:
- The page_visit_count, latitude and longitude field types are numbers and you should select Number for these fields.
- The page_visits field type is a text string however this can get quite long if a visitor browses around your website before submitting a form. There are two options here: you can instead use the Text Area (Long) field type which can store up to 131,072 characters. The other option is to use the Text field type and use the website script parameter pageVisitsMaxLength to limit the maximum length of the page_visits to 255 characters. See here for more details.
GCLID: a critical field to include - twice
We will use the Google Click Identifier, gclid to identify the original advert in Google Ads when we track the conversion events in Part 4. For this reason you should create the GCLID field in both the Lead object and the Opportunity object in Salesforce. Without these Google Ads won't be able to reference the right advert when we link Google Ads and Salesforce. Note: Google suggests capitalising the field name - so 'GCLID' rather than 'gclid'. In our testing both versions work.
B: Populating Salesforce fields on form submit
The way you send data to Salesforce depends on the website technology you're using - and there are many choices here. In all cases you need a way to identify the website form submission and form fields to Salesforce. The easiest way to do this is to use Salesforce's built-in Web-to-Lead tool that generates the form code needed. Start by clicking on Setup in the top right menu:
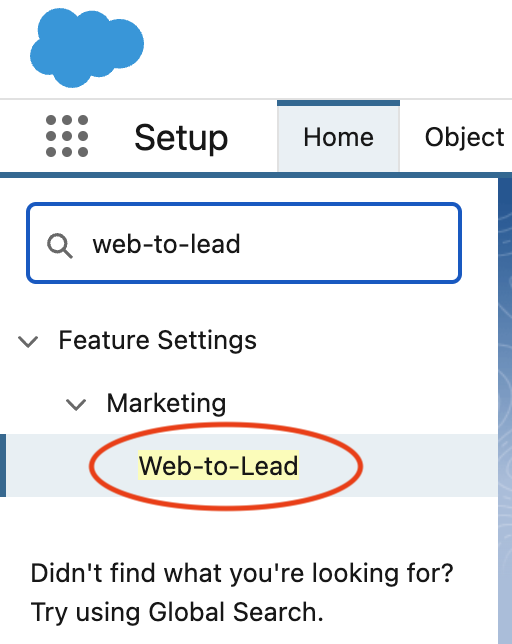
Then enter 'Web-to-lead' in the Search box and click on the 'Web-to-Lead' link under 'Marketing':
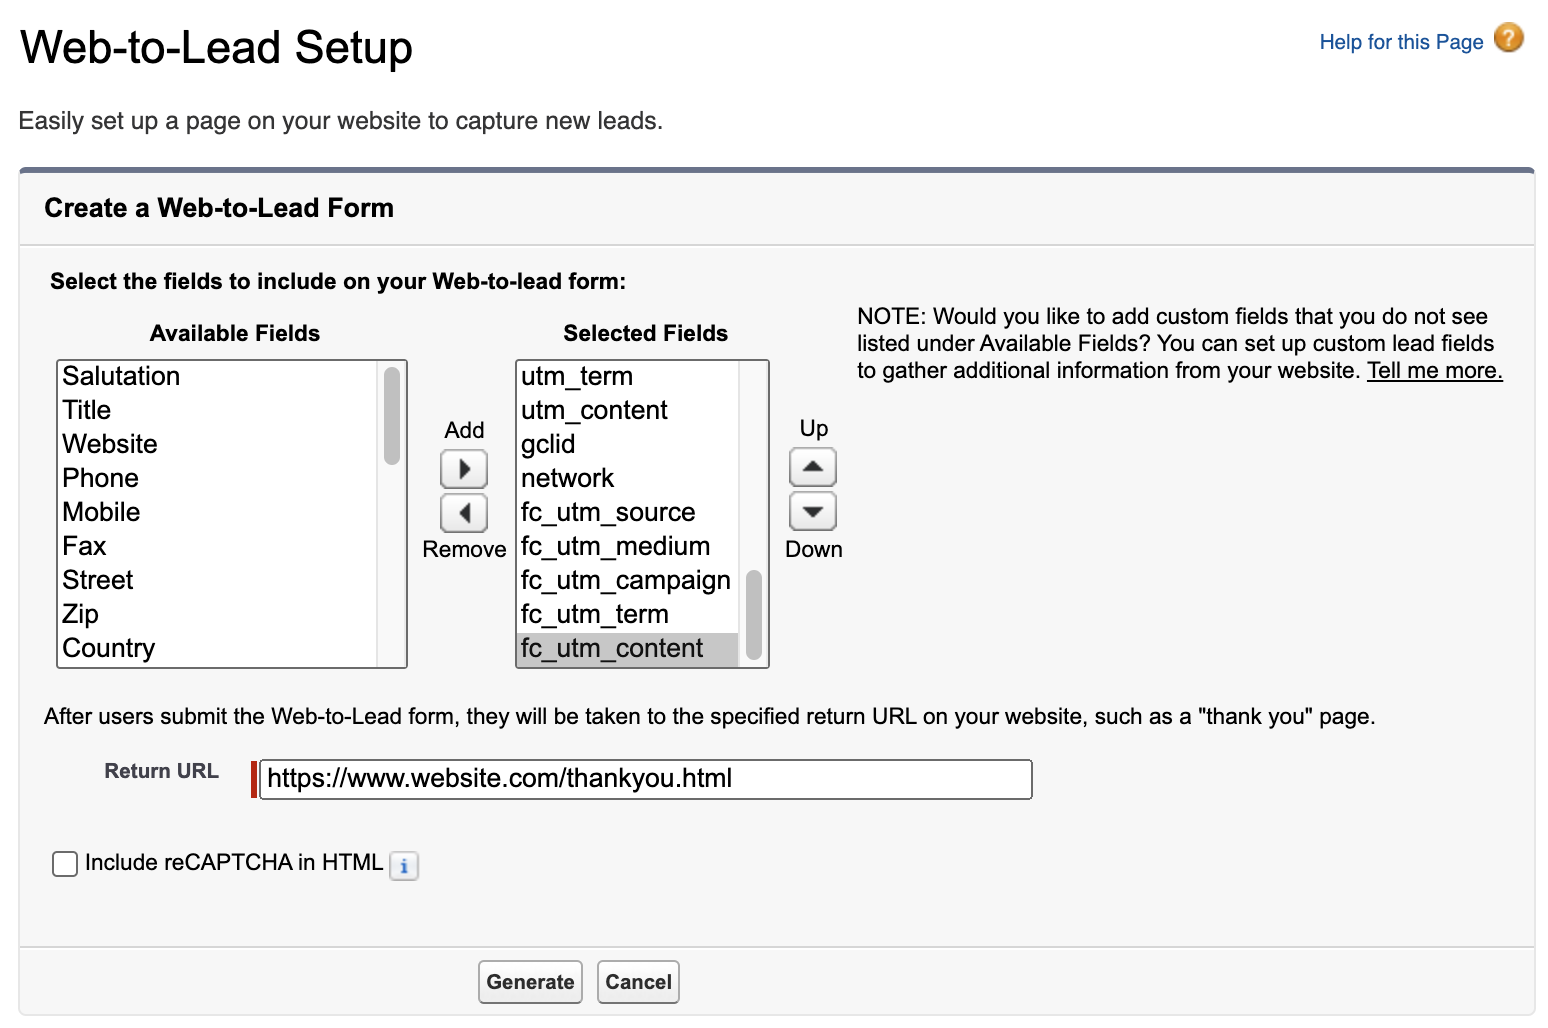
Next you select the fields you want to include in the form. Here you will want to select the UTM fields like utm_content and utm_term. Please make sure to include the gclid field as this is needed for sending the conversion signal back to Google Ads in the next step. If you are editing an existing form you don't need to worry about the Return URL and reCAPTCHA. If this is a new form then set these values appropriately:
After clicking 'Generate' you will be presented with the HTML form code like below:
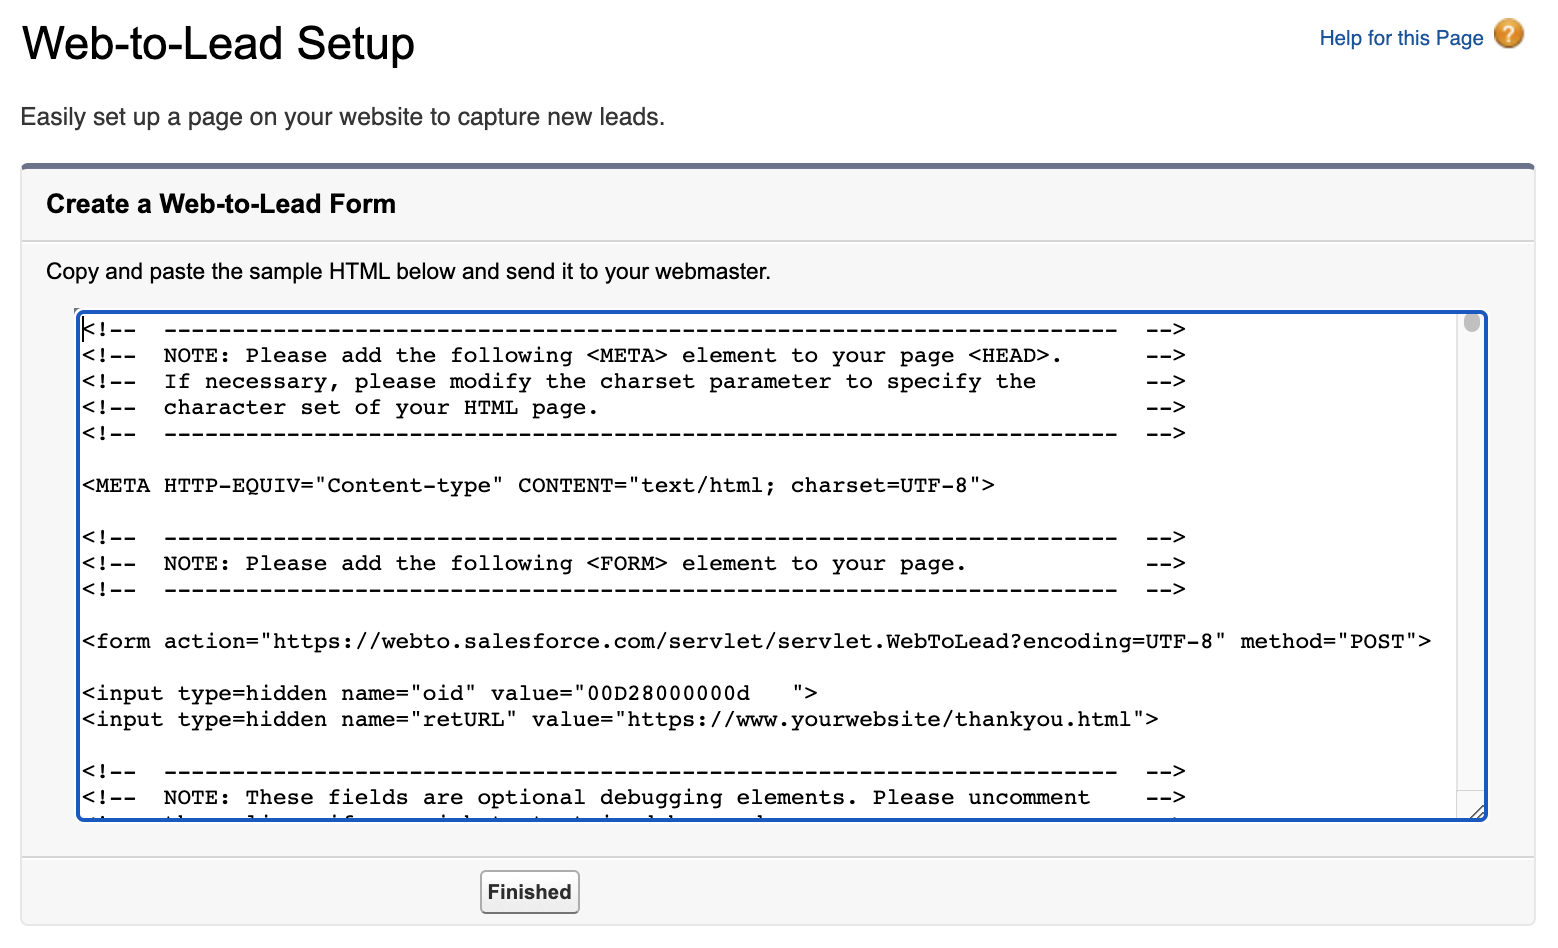
We're going to assume you're editing an existing form. The important lines of the HTML form that is generated are the lines related to the form action and the UTM input fields. You'll see rows items like these in your generated code:
<form action="https://webto.salesforce.com/servlet/servlet.WebToLead?encoding=UTF-8" method="POST">
<input type=hidden name="oid" value="00D28000000a0mw">


utm_content:<input id="00N2800000J77Iz" maxlength="255" name="00N2800000J77Iz" size="20" type="text" />
utm_term:<input id="00N2800000J77Ab" maxlength="255" name="00N2800000J77Ab" size="20" type="text" />
utm_campaign:<input id="00N2800000J77Js" maxlength="255" name="00N2800000J77Js" size="20" type="text" />
utm_medium:<input id="00N2800000J77Ix" maxlength="255" name="00N2800000J77Ix" size="20" type="text" />
utm_source:<input id="00N2800000J77Ny" maxlength="255" name="00N2800000J77Ny" size="20" type="text" />
Lines 1 and 2 set the place where the form data is sent (webto.salesforce.com) and pass the Salesforce Organisation Id (oid) for your Salesforce organisation.
Lines 4 - 8 contain the names of the custom fields you have setup. You'll see that each input field has an id and name set to the same long string of text. This is the unique identifier that Salesforce has created for the field. You'll need to make 2 changes to each input field. Illustrating with the first field, utm_content:
//ORIGINAL
utm_content:<input id="00N2800000J77Iz" maxlength="255" name="00N2800000J77Iz" size="20" type="text" />

//REVISED
<input id="utm_content" maxlength="255" name="00N2800000J77Iz" size="20" type="hidden" />
The two changes are to set the id to the name of the field and to set type to "hidden" which makes this a hidden form field. You can safely ignore the field label 'utm_content'.
Make these edits for all the custom form fields you created and then include these fields in your website forms. The website script will automatically recognise and populate the values for the custom fields, and Salesforce will automatically recognise and store these values when the form is submitted.
Congratulations! We've completed the third step: we can now store the UTM information as well as other valuable marketing data in the CRM System when forms are submitted. On to Part 4 - Passing conversion events back to Google Ads:
- Adding UTM information to Google Ads links
- Capturing visitor and campaign information on the Website
- Storing visitor and campaign information in the CRM System
- Passing conversion events back to Google Ads
References
Salesforce Custom Field Overview: Create Custom Fields
Salesforce Custom Field Types: Custom Field Types
Salesforce Integrations: Integrating Wordpress with Salesforce