Google Ads Attribution
Part 1: Adding UTM information to Google Ads links
Adding UTM information to Google Ads links
The first part relates to Google Ads default Auto-tagging and the use of the GCLID (Google Click Identifier). Here's what a typical Googls Ads URL looks like:
https://www.domain.com?gclid=CjwKCAiAqt-dBhBcEiwATw-ggCwDCfE_XDORermGtC5GtDWzujMKcnkDHK6JtFfclDltyj6gZe3e_BoCTw0QAvD_BwE#
The GCLID is the long random set of characters after the ?gclid= that Google creates uniquely for each search result. The other commonly-used system for tracking is the UTM (Urchin Tracking Module) system. This uses 5 standard parameters for capturing visit source information:
- utm_source: Identifies the site that sent the traffic. Example: utm_source=google
- utm_medium: Identifies the type of medium - like email or social media. Example: utm_medium=cpc
- utm_campaign: Identifies the campaign. Example: utm_campaign=cny_promotion
- utm_term: Identifies the search terms the visitor entered. Example: utm_term=deals
- utm_content: Identifies what was clicked-on at a more granular level such as the Advertising Group. Example: utm_content=ad-variant-1
Helpfully, Google Ads enables us to automatically add UTM tags to every advert that is generated in addition to the GCLID. In addition, we can set Google Analytics to rely on the GCLID and not the UTMs for Analytics reporting - which means we get the benefit of GA's rich reporting using GCLIDs as well as the valuable information contained in the UTM parameters.
A: Creating a tracking template in Google Ads
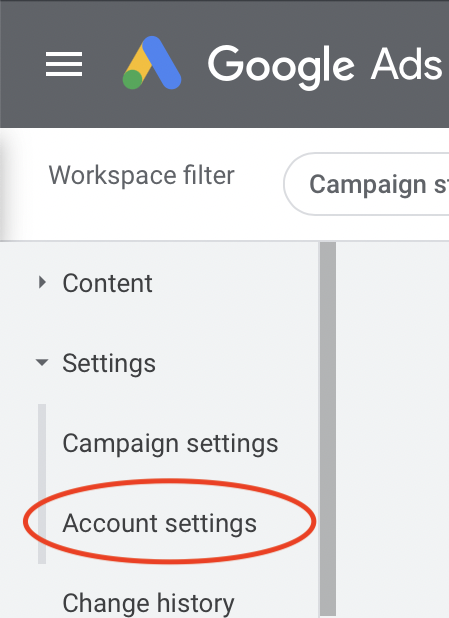
Navigate to the top-level of your Google Ads account and click on Settings then Account Settings.
From here, click on the Tracking dropdown:
Enter this code in the Tracking template:
{lpurl}?utm_source=google&utm_medium=cpc&utm_term={keyword}&network={network}&utm_campaign={_campaign}&utm_content={_adgroup}
This creates a template for every search result and asks Google to include the 5 UTM parameters as well as a network parameter.
- Two of the parameters are fixed text: utm_source is set to 'google' and utm_medium is set to 'cpc'. You can change these if you want.
- Two of the parameters are pre-defined by Google: utm_term is set to {keyword} which is the search text the visitor entered and network is set to {network} which is where the click came from: 'g' for Google search, 's' for a search partner, 'd' for the Display Network, 'u' for a Smart Shopping Campaign, 'ytv' for YouTube videos, 'yts' for YouTube search, or 'vp' for Google video partners.
- The final two parameters, utm_campaign and utm_content are dynamically defined by the script we'll set up in the next step.
B: Enabling a script to set dynamic Google Value Track Parameters
Out of the box Google Ads provides campaignId and adGroupId values we could use for uniquely identifying campaigns and advertising groups. The challenge is that these are randomly generated identifiers from Google rather than something we set up. What would be more useful is the actual campaign name and ad group name. We can get these values by asking Google Ads to run a script for each ad group in each campaign to set these values.
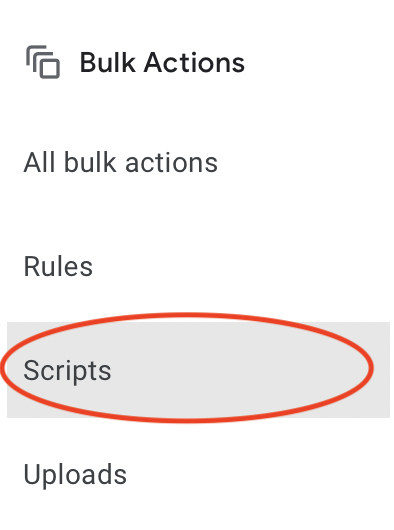
Setting up a script is easy: from the 'Tools and settings' menu click on 'Scripts' under 'Bulk Actions':
This opens up the scripts window where you can add a new script. Name the script something like 'AddCustomParameters' and then paste in the code below and click 'Save'. When prompted, click 'Authorize' so the script can access the account on your behalf.

function main() {
  let adGroups = AdsApp.adGroups().withCondition("campaign.status = ENABLED").get();
  while (adGroups.hasNext()) {
    let adGroup = adGroups.next();
    let adGroupName = encodeURIComponent(adGroup.getName());
     let campaignName = encodeURIComponent(adGroup.getCampaign().getName());
     adGroup.urls().setCustomParameters({ adgroup: adGroupName, campaign: campaignName });
  }
}
This code loops over each active advertising group getting the ad group and campaign names and setting these as custom parameters that the template we set up previously will use to set the UTM parameters utm_campaign and utm_content.
Now we need to make this script run every hour. Click on 'Scripts' on the left hand side to see a list of all of your scripts, then click on 'Frequency' for the 'AddCustomParameters' script and select 'Hourly' and 'Save'.

C: Ensuring Google Analytics uses GCLID for reporting, not UTM values
The final step for adding the UTM parameters is to ensure Google Analytics uses GCLID for reports and analysis and not the UTM values we've just set up. In this way we get the best of both worlds: the advanced capabilities and insights enabled by GCLID in Google Analytics and the UTM data for our CRM System.
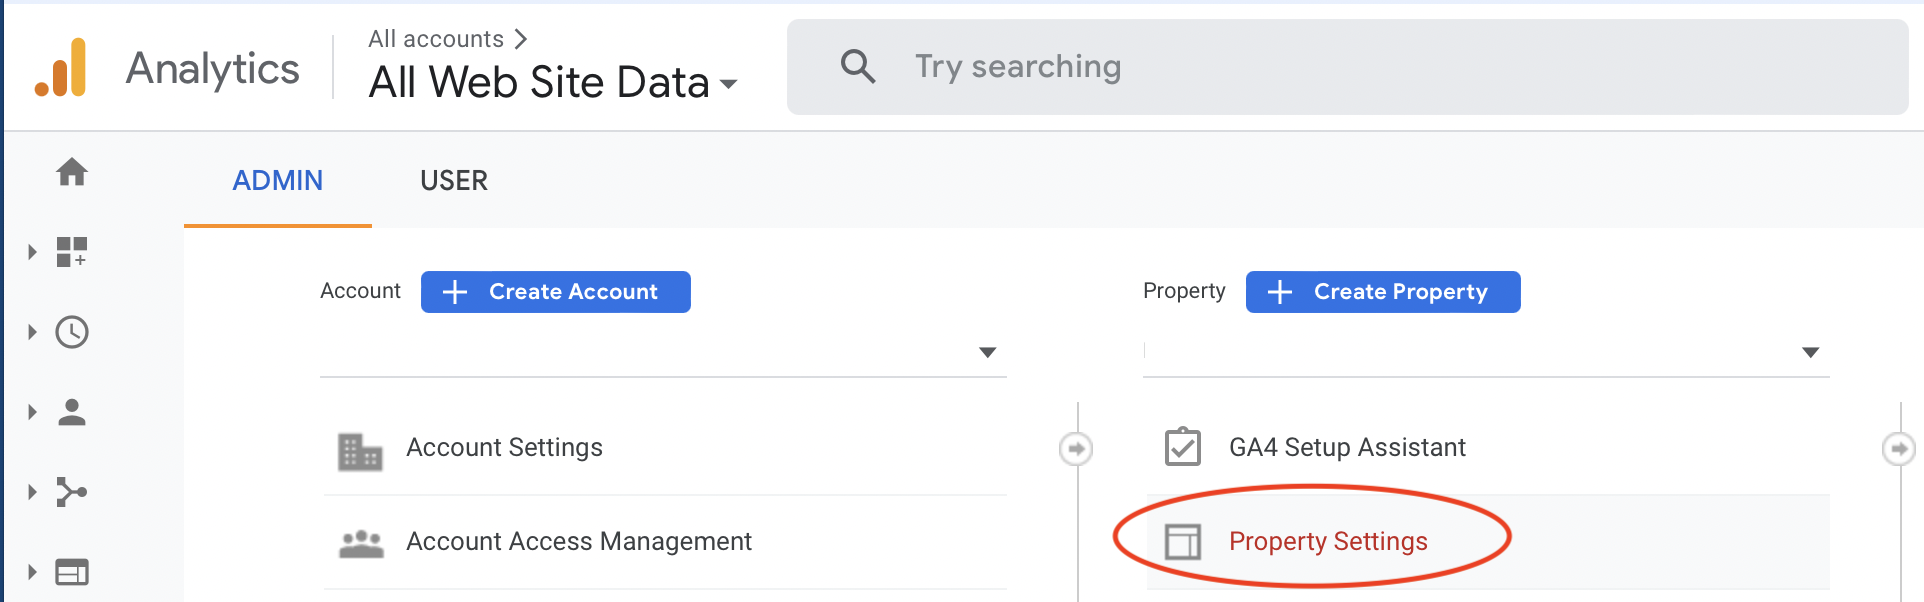
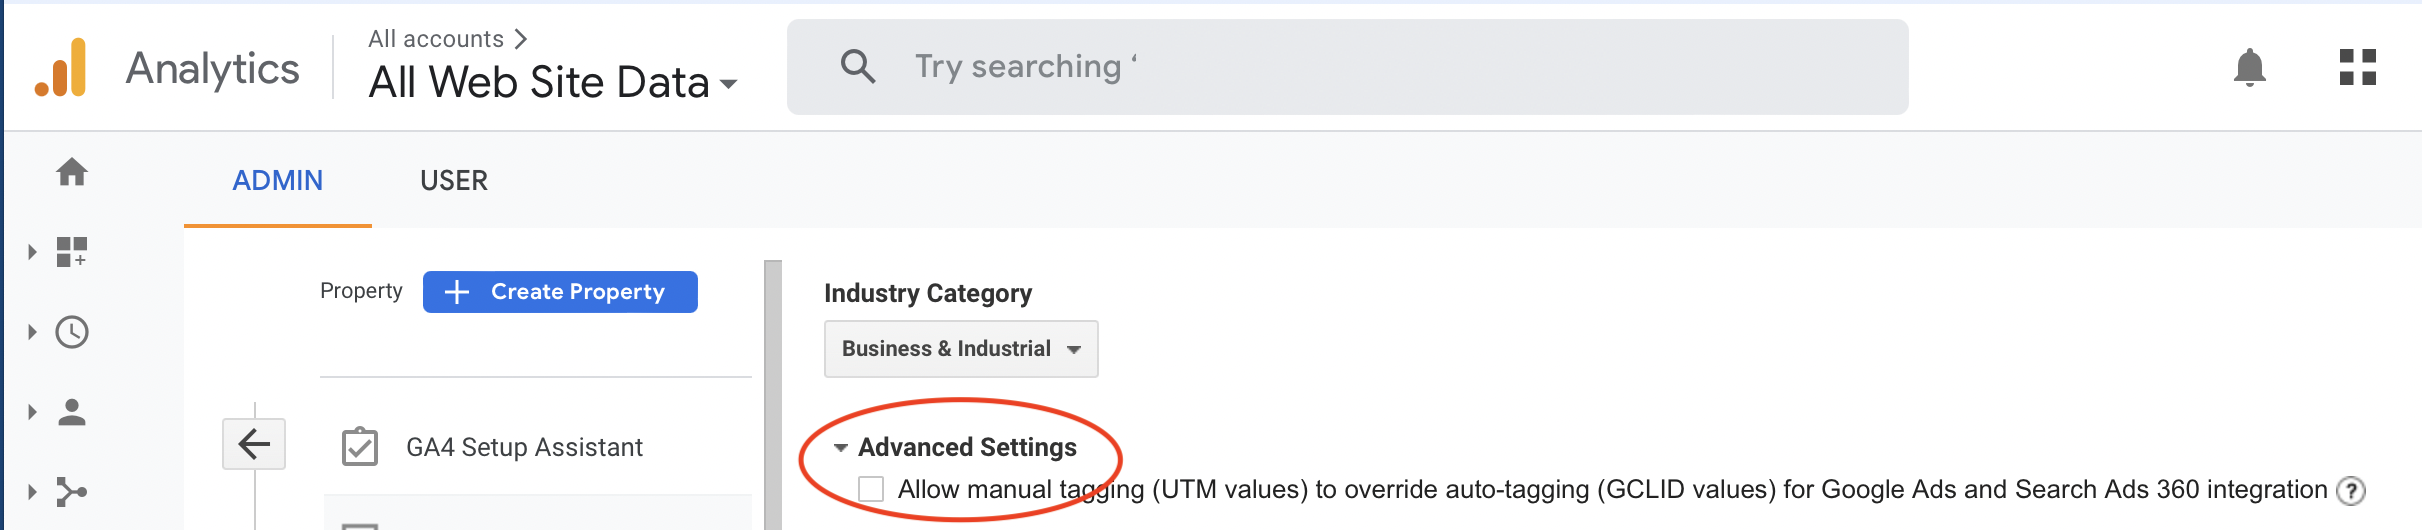
To do this go to Google Analytics and click on 'Admin' and navigate to the relevant property. Then click 'Property Settings'. Make sure the checkbox in 'Advanced Settings' that allows UTM values to override GCLID values is not checked.
Congratulations! We've now solved the first challenge: Adding UTM information to Google Ads links. Now on to Part 2:
- Adding UTM information to Google Ads links
- Capturing visitor and campaign information on the Website
- Storing visitor and campaign information in the CRM System
- Passing conversion events back to Google Ads
References - ValueTrack and UTM
Google Value Track Parameters: Value Track Parameters
Google: How you can use ValueTrack: ValueTrack examples
Ad Group Iterator documentation: AdsApp.AdGroupIterator
How to Set Up Account-level UTM Parameters: Armando Roggio article
UTM Tagging vs Auto-Tagging for Google Ads: Dan McGaw article